Exterior rendering
House Rendering in West Bridgford | A Complete Exterior
A whole-house finish should make sense of the building you have. That may mean connecting several additions, retaining a distinctive bay or simplifying a mixture of old coverings. Begin with the important shapes and details, then choose a suitable system for each background. One colour can bring a scheme together without requiring every wall to be treated identically.

On this page
Keep the features that give the house its shape
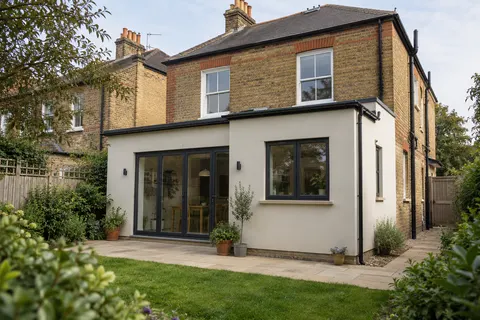
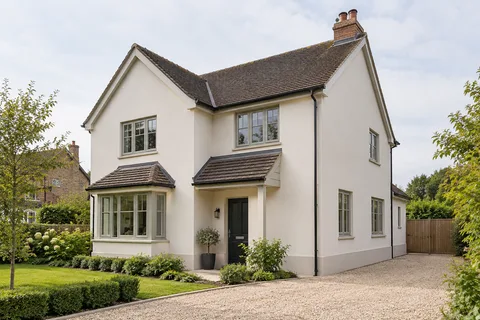
Look at the roof line, windows, entrance and any projecting bays before marking the areas to render. These elements establish the proportions of the elevation. A decorative brick band or recessed panel may be worth keeping, but only after its condition and the adjoining detail have been assessed. Covering every surface is not a necessary part of creating a coordinated exterior.
Photograph the house from the approach and from the garden. Those views often reveal relationships that a close survey photograph misses: an extension may appear much larger from one angle, or a rendered side wall may be visible behind a retained brick frontage. Use the images to decide where continuity is useful and where a clear change of material would look deliberate.
If the project is part of a wider redesign, include proposed windows, roof alterations and landscaping in the discussion. Their dimensions and colours can affect the finish decision. Keep confirmed changes separate from ideas that remain uncertain so the renderer is not asked to price a moving target or assume that another trade will resolve a difficult connection later.
- Scaffold and protection Windows, doors, paths and planting are covered; downpipes, lights and satellite brackets come off.
- Old finish tested or removed Failed render is removed; the survey decides whether any sound areas can remain within the specified system.
- Masonry repairs and beads Cracked bricks and open joints are repaired; corner, stop and base beads are fixed.
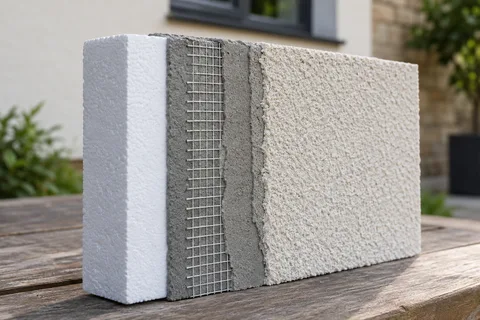
- Base coats Sand-and-cement scratch and float coats, or a manufacturer basecoat with mesh.
- Finish coat A painted, scraped or thin-coat coloured finish, applied in suitable weather.
- Fittings and junctions Fittings are refixed through the new surface; sills, roofline and abutments are sealed.
The usual order of work. The survey and the chosen products decide the actual steps.
Map the backgrounds behind the intended appearance
The house may contain original masonry, rebuilt areas, an extension and old repairs. Establish what can be inspected and what remains concealed by the existing covering. Each background needs appropriate preparation within the selected system. The specification should explain those differences rather than use a single phrase such as render all walls and leave the important decisions unstated.
Where pebbledash removal is proposed, the condition beneath it can change the next stage. A trial helps assess removal and the likely preparation, but it does not reveal every hidden area. Agree how findings will be reviewed before wider work proceeds. If exposed brick is desired in part of the scheme, its suitability must be investigated rather than promised from the outside.
Older fabric may need a lime-based specification, while a modern addition may receive another system. The visual relationship can be coordinated with samples. Compatibility should not be sacrificed merely to obtain one product across the entire building. The pebbledash and lime guides explain those decisions in more detail.
Compare materials at the scale of the house
Silicone and monocouche finishes have different textures and system requirements. Ask for the complete proposed build-up on each background, then compare representative samples. A small card may help narrow colour, but it cannot show how grain and light interact across a broad gable. View the sample beside retained masonry, roof tiles and frames from normal distances.
A single shade may appear warmer on a sheltered rear wall than on an open front elevation. Consider those views before introducing extra colours to compensate for every change of light. Too many small colour divisions can make an otherwise simple building feel fragmented. There is no universal answer; the decision should be based on the actual house and the effect you want.
Where a separate wall is being completed first, define its boundaries so later work can follow coherently. The wall rendering page helps with a limited elevation package. Keep the installed product and sample information, while recognising that a later batch or an aged finish may not match perfectly without further assessment.
| Decision | What it affects |
|---|---|
| Retained features | Finish boundaries and protection |
| Different backgrounds | Preparation and system specification |
| Window changes | Reveals, sills and final dimensions |
| Roof and pipe work | Sequence and water-shedding details |
| Colour and texture | The appearance of the complete elevation |
Resolve openings, projections and access
Sills, bay corners and porch roofs need to work with the proposed wall thickness. A finish can alter their relationship even without insulation, particularly where a thick old covering is removed. Ask for details at awkward connections rather than assuming the renderer can make every edge fit on the day. Necessary changes to other building elements should have an identified responsibility.
External wall insulation makes this coordination more extensive. Its design must address the thermal and moisture implications as well as the visible proportions. Bay reveals, eaves, pipes and attachments should be resolved as part of the complete system. Do not choose the decorative coat first and expect the insulation thickness and terminations to follow without design input.
A glazed extension or retained porch may restrict access to upper walls. Provide photographs showing the full arrangement and let the competent access provider establish a suitable method. Protection of the structure below and the route used by occupants should be part of the planned work, not a last-minute assumption based on the wall area.
Review the result as a building, then as a set of details
At the appropriate stage, compare the broad appearance with the accepted sample and intended scheme. Then follow the edges around openings, retained features and roof junctions. Check reinstated fittings and identify any outstanding work clearly. A general view can look complete while small returns or upper connections remain unfinished.
Keep the final specification and approved changes with the product information and relevant care guidance. The record should distinguish deliberate differences between elevations from omissions. This is useful when a future repair, extension or colour treatment is considered and someone needs to understand why two parts of the house were specified differently.
For existing damage that does not justify a complete refurbishment, consider the repair route on its own merits. A whole-house colour scheme should not turn a local condition issue into unnecessary replacement. The appropriate extent follows the assessment and the intended result, with the limits stated clearly in the accepted scope.
Common questions
Must all walls look identical?
No. A coordinated scheme can retain different materials and textures. Their boundaries and relationships should be deliberate and technically suitable.
Can a porch remain untouched?
Yes, if it is excluded clearly and its connection with the new work is resolved. Protection and access around it still need consideration.
Will rendering change the appearance of a bay?
It can affect texture, colour and the visual relationship of corners and reveals. Added insulation also changes dimensions and needs specific design.
What should be approved before work?
The extent, suitable system, important details, sample and responsibilities should be clear, alongside a process for concealed findings.
See housing and planning information for West Bridgford and nearby places, including the source and geography behind each figure.