Exterior rendering
Wall Rendering in West Bridgford | Defined Elevation Work
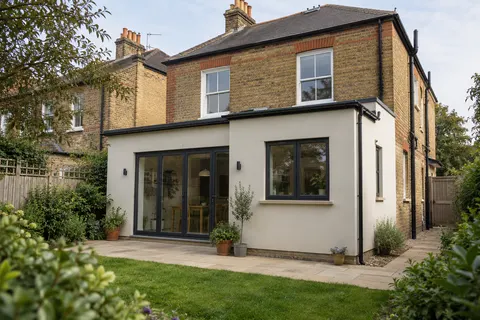
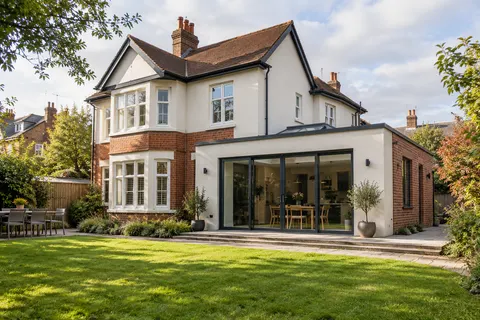
One elevation can transform the view from a garden or complete an extension without changing the whole house. Its success depends on how it meets the surfaces around it. A defined wall package should include the main face, small returns and every edge that makes the work look complete.

On this page
Choose a boundary that belongs to the building
A corner, recessed return or change in construction may offer a sensible stopping point. A line across the middle of a broad wall can also be designed, but it is likely to remain visible. Decide whether the new finish is intended to blend with adjacent work or create a clear distinction. Do not leave that choice to an installer interpreting a general request to tidy the wall.
Mark narrow strips above roofs, below windows and beside adjoining structures. These can be easy to miss when measuring only the main rectangle. Include the depth of reveals and any return that is visible from a normal approach. The quotation should make clear whether these details receive the new finish, remain exposed or require separate making good.
Retained brick bands and stone details need their own boundary treatment. Their projection may be reduced visually or physically by the new wall build-up. Check the relationship before choosing a finish thickness. The drawing should show a buildable edge, not simply a coloured line over a photograph.
- Set the edges Decide where new render stops against brick, stone or an existing finish.
- Prepare the background Remove loose material, repair masonry and prepare suction and surface key. Existing paint needs a specified removal or alternative treatment.
- Base coat Built up to level the wall, with mesh where backgrounds change or crack.
- Finish Matched to the rest of the house or chosen as a deliberate contrast.
- Shed the water Copings, sills and the base bead keep rain off the top and away from the bottom edge.
The usual order of work. The survey and the chosen products decide the actual steps.
Assess the wall before deciding what stays
Existing paint or render may conceal patches and changes in masonry. New blockwork can contain incomplete joints or areas affected by other trades. The preparation should be based on the actual background and the requirements of the proposed system. A wall that looks uniform from the garden may need several different preparation details.
Cracks and loose areas need assessment of their cause and extent. A new covering should not be expected to stabilise an unresolved defect. Where only limited intervention is appropriate, render repair may be the better-defined package. If removal is necessary, establish how concealed findings will be reviewed before the replacement finish is applied.
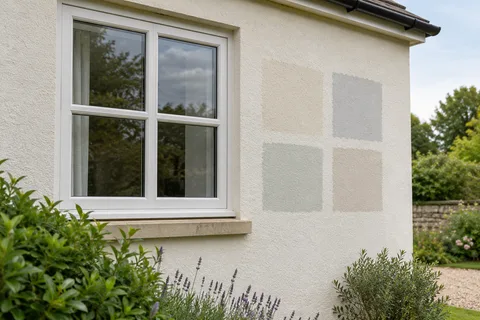
For traditional fabric, material compatibility can affect the choice significantly. An old wall and a modern extension should not automatically receive the same product just because they share an elevation. Keep any different specifications and the junction between them clear, then coordinate the appearance with suitable samples.
Make the finish suit the view
A garden-facing wall may be seen at close range from seating or through large windows. Its texture can therefore be more prominent than the texture on a distant gable. Compare representative samples in the actual viewing position. A photograph of another house gives ideas but cannot establish how the finish will sit beside your retained brick, frames or planting.
Silicone systems and monocouche offer different surfaces, preparation and application requirements. Ask which is suitable for the assessed wall before comparing colours. If the existing covering is sound and only its appearance is changing, a compatible colour treatment may be worth considering instead of replacement. The retained profile remains part of that result.
Where adjacent walls will be refurbished later, avoid promising an exact future match to a surface that will weather in the meantime. A clear boundary can make phased work more manageable. Keep the installed product, shade and texture information so the next proposal begins with reliable details rather than a guess from a faded photograph.
| Part | Include in the brief |
|---|---|
| Main face | Extent and existing condition |
| Openings | Reveals, sills and frame connections |
| Returns | Depth and stopping points |
| Retained features | Protection and edge detail |
| Top and base | Roof, coping and ground relationships |
Coordinate what sits above, below and in front
A porch roof, glazed extension or canopy can make access more complex. Show its construction and the available ground beneath or beside it in the survey information. The access provider must determine a suitable arrangement; the roof should not be assumed to support working equipment. A small rendered area may still require substantial planning to reach safely.
Pipes, lights and vents may need temporary removal or altered fixings. Agree the final positions and who reinstates them. If window or roof work is also planned, establish the sequence before the wall is finished. Late cuts and improvised attachments can disturb a carefully prepared surface and leave details inconsistent with the original specification.
At ground level, review paving, soil and any relevant drainage. The finish should terminate appropriately for the building and the selected system. Extending it downward simply to create a visually continuous colour can conceal a detail that needed a different treatment. Include any necessary adjacent work rather than expecting the render to compensate for it.
Check the completed extent while access remains useful
Review the wall against the marked scope and approved sample. Follow its perimeter and inspect the returns, not only the central surface. Identify outstanding fittings or small unfinished areas precisely. Suitable inspection of upper details should be planned before access equipment is removed, with the appropriate people carrying it out safely.
Photographs and material information help future maintenance, especially where the wall sits above a structure that limits access. Keep any different background treatments or designed joints in the record. The final documentation should explain the installed work without implying that every wall elsewhere on the property has the same construction.
If the project expands to include other elevations, revise the scope rather than allowing additional work to grow through informal requests. The house rendering guide helps consider the complete building and the relationships between separate walls. A clear change of scope protects both the intended appearance and the practical sequence.
Common questions
Can a gable be rendered on its own?
Yes, subject to suitability and the relevant checks. Its edges, access and relationship with the remaining elevations need a defined specification.
Can new render meet old painted render?
Potentially, with a suitable detail and assessed backgrounds. Texture and ageing may prevent an invisible visual match.
Does a garden-facing wall need the same finish as the front?
Not necessarily. Compare the intended appearance and technical requirements of each wall rather than assuming uniformity is essential.
Are small returns included automatically?
No assumption should be made. Mark them and include their treatment in the accepted scope.
See housing and planning information for West Bridgford and nearby places, including the source and geography behind each figure.